20
Jul
#DOORDIY: Weatherproofing Your Door With Weatherstrip
#DoorDIY: Weatherproof Your Door With Weatherstrip
#DoorDIY: How to Weatherproof Your Door With Weatherstrip
The right weather seals around your entryway help seal out air and water year-round and can provide energy-savings year-round. Weatherstrips are easy to install and can have a big impact on your door’s performance. In this project guide, we’re teaching you how to install weatherstrip at your door in 6 easy, steps. Moisture and air don’t stand a chance with a proper seal at your entryway. Let’s get started!
Remove old weatherstrip a. Open the door panel to access the weatherstrip.
b. Grab one end of the weatherstrip and pull it along the length of the door frame, away from the jamb. You may need to use needle nose pliers to remove the weatherstrip if it has aged or been damaged.
STEP 1
b. Grab one end of the weatherstrip and pull it along the length of the door frame, away from the jamb. You may need to use needle nose pliers to remove the weatherstrip if it has aged or been damaged.
Clean all door jambs. a. Using a dry cleaning cloth, wipe down the door jambs and header to remove any remnants of weatherstrip or residue. Clean the bottom corners as well.
STEP 2
Measure and cut the weatherstrip for the header. a. Measure the width of the header frame.
b. Cut the new piece of weatherstrip to match the header width size. Make sure to cut the weatherstrip ends square and even.
STEP 3
b. Cut the new piece of weatherstrip to match the header width size. Make sure to cut the weatherstrip ends square and even.
Insert the weatherstrip into the door header. a. Place the end of the weatherstrip against the side jamb. Insert the weatherstrip into the header frame kerf slots with the open side facing upwards.
b. Press the weatherstrip firmly across the entire length of the header to secure it into the kerf slot.
STEP 4
b. Press the weatherstrip firmly across the entire length of the header to secure it into the kerf slot.
Measure and cut weatherstrip for side jambs. a. Measure the left and right jamb or mullion length.
b. Cut the new piece of weatherstrip to match the jamb length minus 1/8``. Make sure to cut the weatherstrip ends square and even.
STEP 5
b. Cut the new piece of weatherstrip to match the jamb length minus 1/8``. Make sure to cut the weatherstrip ends square and even.
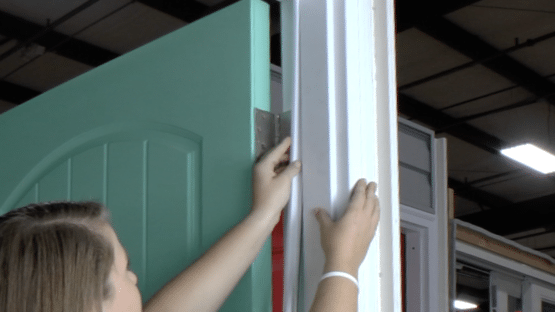
Insert the weatherstrip into the side jambs. a. Place the end of the weatherstrip against the header weatherstrip at the top corner. Insert the weatherstrip into the jamb kerf slots with the open side facing towards the door jamb.
b. Starting at the top, press the weatherstrip firmly down the entire length of the jamb to secure into the kerf slot. Repeat for the other jamb.
STEP 6
b. Starting at the top, press the weatherstrip firmly down the entire length of the jamb to secure into the kerf slot. Repeat for the other jamb.

